Cricut Print Then Cut Basics

In this blog post we'll share the Cricut Print Then Cut basics so you can easily create stickers with your Cricut machine.
We are using the small business sticker set found in the Boss Babe's Design and Font Bundle. These designs work perfectly with Cricut Print Then Cut!


Upload the sticker design set into Cricut Design Space.

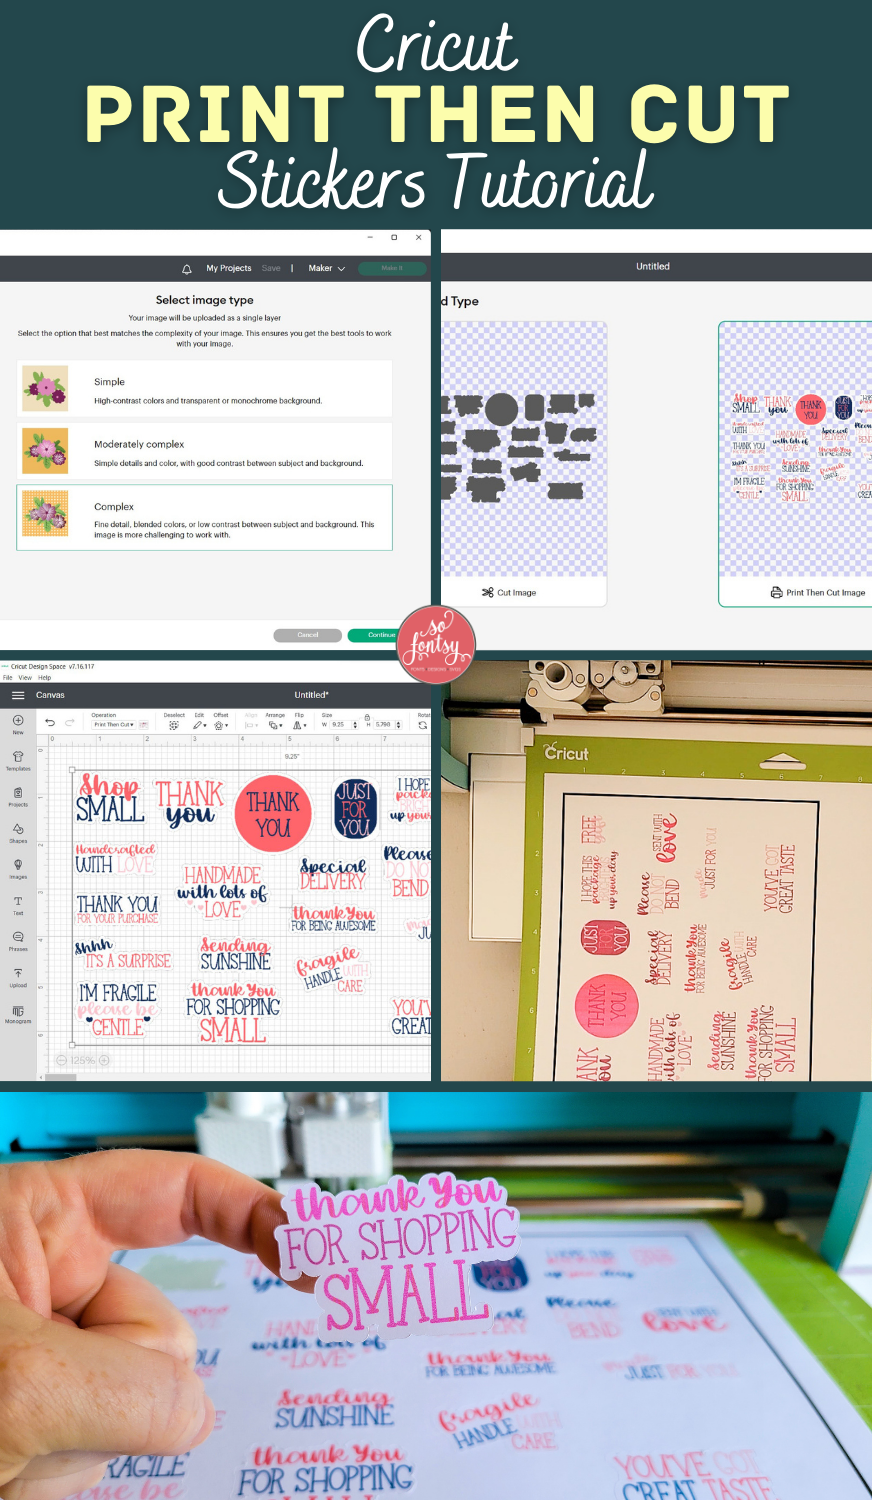
Use the image pre-viewer to see what option gives you the best results for the image you're using.
For high complexity and colorful images, click Complex.

There's no need to do any image editing here because this high-quality PNG file already has the background removed.

Select the Print Then Cut Option.

Add the uploaded sticker set to a new Canvas.

Resize the sticker set to fit within 6.75 inches and 9.25 inches and click Make it!

Print out the sheet on white sticker paper.
The sticker paper we used is the standard matte white sticker paper from Online Labels.

Follow the prompts in Cricut Design Space for cutting the design on sticker paper with your Cricut cutting machine.

To make this project, grab this small business sticker set from the Boss Babe's Design and Font Bundle.

Watch the project video below:
PIN it for later: